


I've been very crafty lately, don't really know why since i have no time left between D's after school activities and keeping up with G and the house and what not, not to mention feeling lousy from a double infection that is just now clearing up.
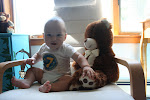
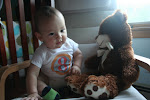
I like keeping busy but this was insane. somehow though in the midst of the chaos that is our life i managed to whip up these 2 shirts for my boys to wear at thanksgiving.


I have to say they came out pretty good I was even impressed.
i made D's on a regular sized t-shirt and G in a long sleeve onesie he had.
the total cost of the project was maybe $10 including the t-shirt and once G was asleep it took about 1 hour from start to end.
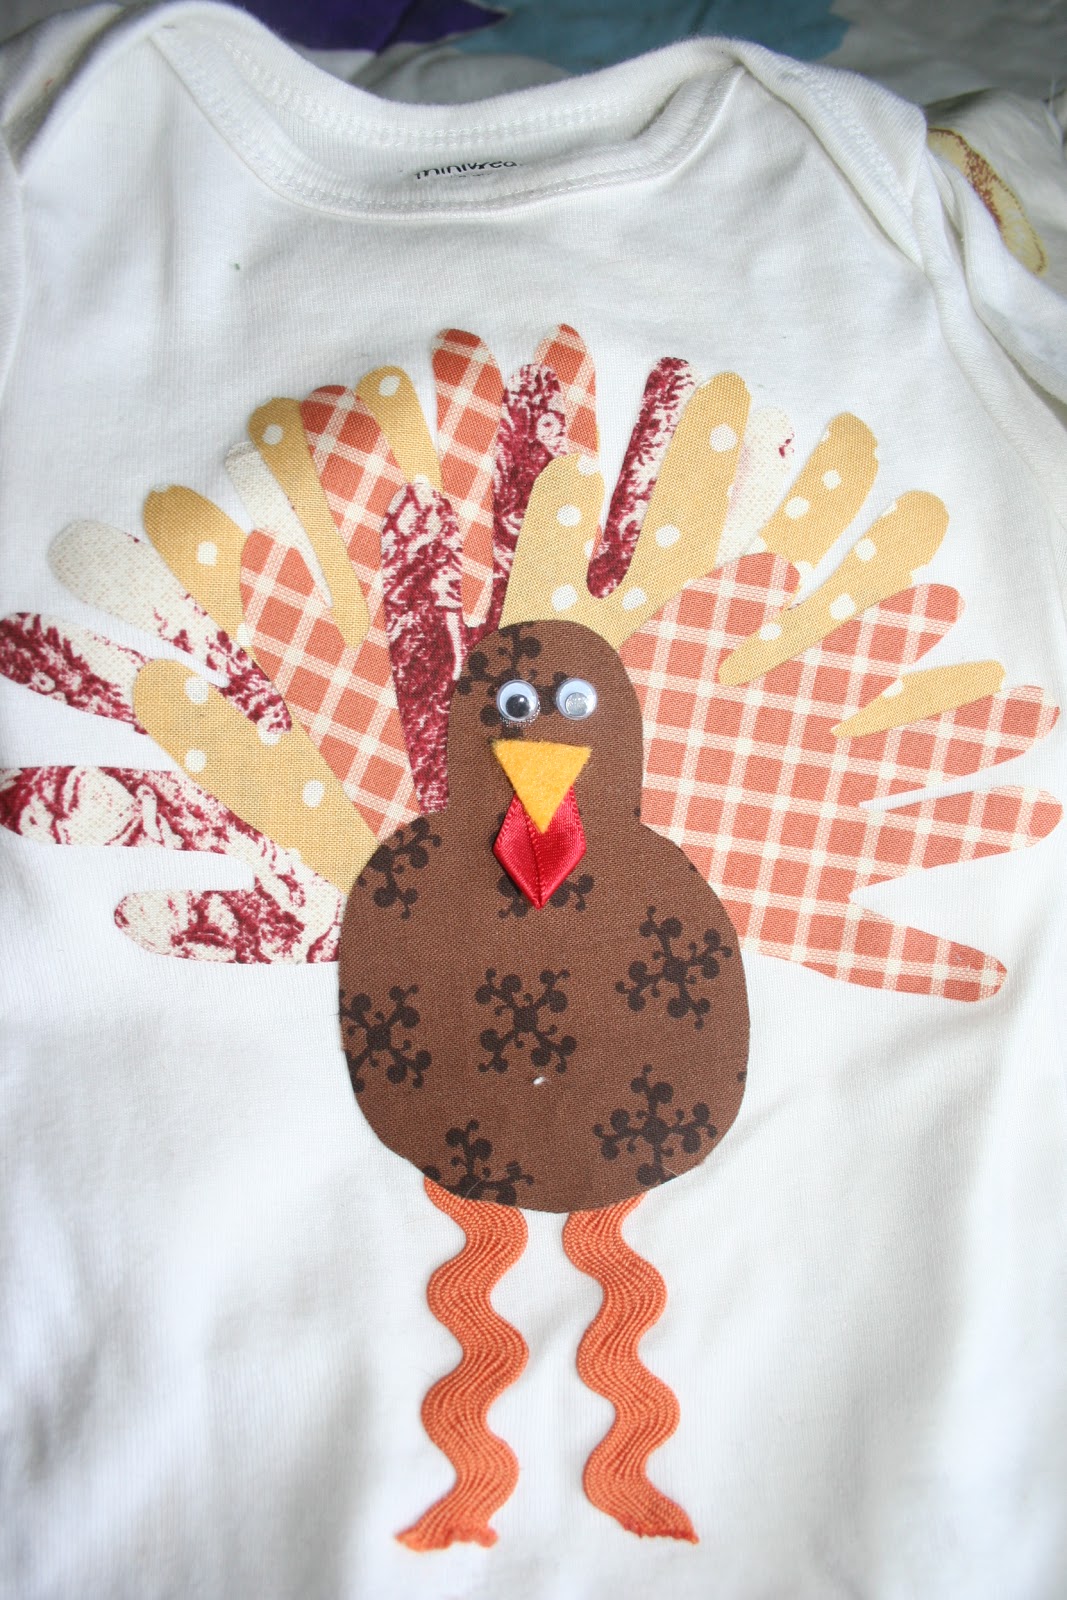
The hardest part was tracing G's hand, but the rest was easy peasey.
What I used:
White tee shirt / onesie
Heat 'n Bond (the red package) i bough a 1 yard package
jumbo orange Rick Rack
red ribbon
fabric in red, orange, yellow, and brown (I bought fat quarters and was able to do both of the boys on one piece with some careful placing)
Liquid stitch
2 googly eyes
lighter
I hand drew the body but you can use this
Trace your child's hands on a piece of paper and cut out them out to use as templates.
for the beak i just cut 2 triangles of yellow felt and sized accordingly (use your judgement)
the Heat 'n Bond package will explain how to use it,but basically i ironed the fat quarter and then applied the Heat 'n Bond to all the fabric.
Using your hand templates i traced with a pencil on the heat bond paper, then cut out the hands, the turkey's body, and beak.
Arrange the hands on the shirt how you'd like them, and iron them down one by one.
place the body down and then the rick rack to see where the lgs would go, then remove the body and glue down the legs with liquid stitch THEN Place the turkey's body back in the middle and now iron down
then place the eyes on with the liquid stitch ( you could also do this art after you do the wattle and beak)
I cut the red ribbon by eyeballing the length that would work with each turkey then used the lighter to "seal" the ends so they won't fray
Fold the ribbon to form the wattle and glue down
next place your beak and iron down
You're done !


1 comments:
These are SOOO cute. I think I might steal this idea for the girls :)
Hope you guys are good
Post a Comment